
ArcGIS for Web Developers: Part 1
Introduction
Are you a web developer that wants to bring maps into your existing applications? I wanted to cover some basics of building web mapping applications and how you can leverage the ArcGIS Platform and the ArcGIS API for JavaScript to do it!
The ArcGIS API for JavaScript is a tool of the larger ArcGIS platform. If you are interested in learning how to use the ArcGIS API for JavaScript to build web applications, it is worth knowing ho to use the platform to your advantage. There’s a lot you can do with ArcGIS. From geocoding, routing, to analysis, and a geocornicopia of content for you to use!
What makes up a map?
When we talk about making maps for web apps, what does that actually mean? A map consists of layers. Layers, in the map sense, are distinct sets of spatial data. They could be roads, buildings, store locations, population, or any other type of data that has a spatial component.
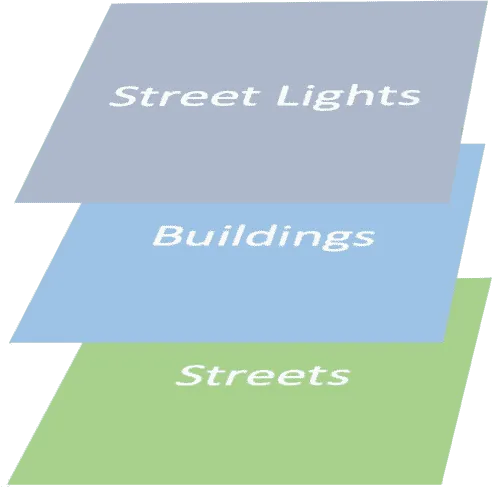
Map Layers
A map contains information about the layers. it also contains information about the extent of the map and more. You can read more in this documentation on What is a Web Map.
Free Developer Account
If you really want to learn to use the ArcGIS API for JavaScript to its fullest potential, I highly recommend you sign up a Free ArcGIS Developer account. This will give you access to all the premium content and ArcGIS premium services to get crazy with! All for the low cost of free-ninety-nine.
Lets’s make a map
When you log in to you ArcGIS developer account, you’ll be presented with a dashboard with lots of information. Feel free to explore the dashboard to satisfy your curiosity. What we want to focus on today is the New Web Map link under the ArcGIS Online section of the dashboard.

Developer Account Dashboard
At this point you’re going to be directed to the Online Map Viewer. The Map Viewer is a great tool that you can use to search, and view data, you can explore the datasets, experiment with visualizations, and save and share your maps with others!
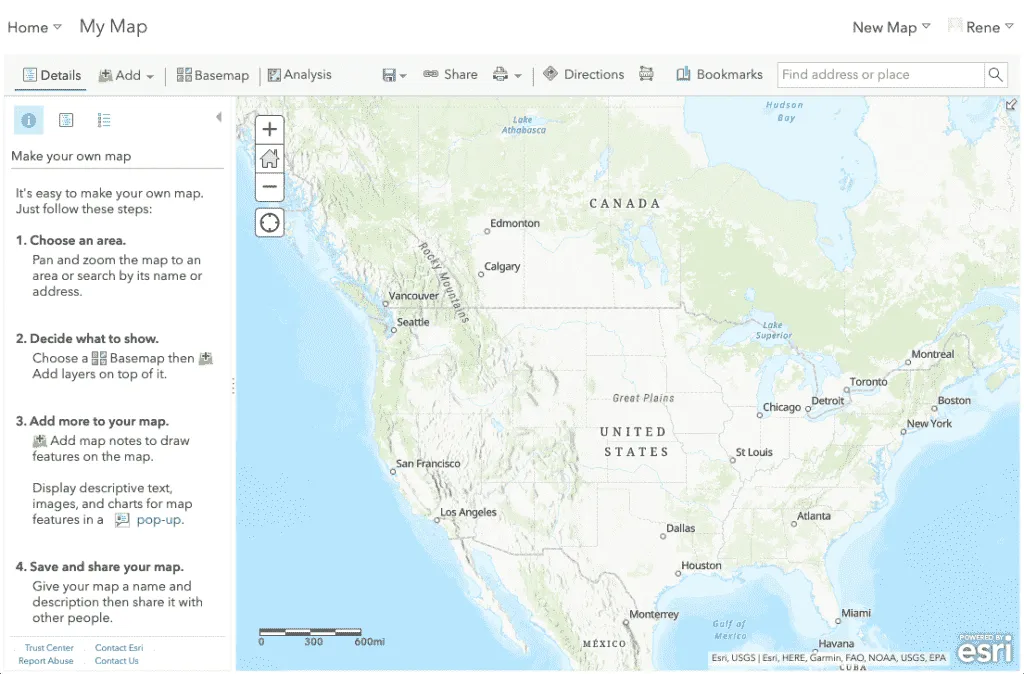
ArcGIS Online Map Viewer
You start with a basic map with a basemap. But let’s make it interesting and add some data to this map. You can click on the Add button and you are going to Browse Living Atlas Layers. Living Atlas is a collection of curated data in the ArcGIS platform. Some of it is put together by Esri, but a lot of it is published by other content providers on the platform.
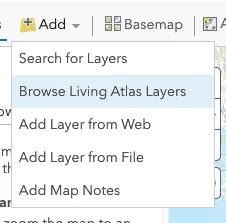
Browse Living Atlas Layers
Search for los angeles and click on the + button next to the first result in the list. I’ll select the Los Angeles Transit Stops.
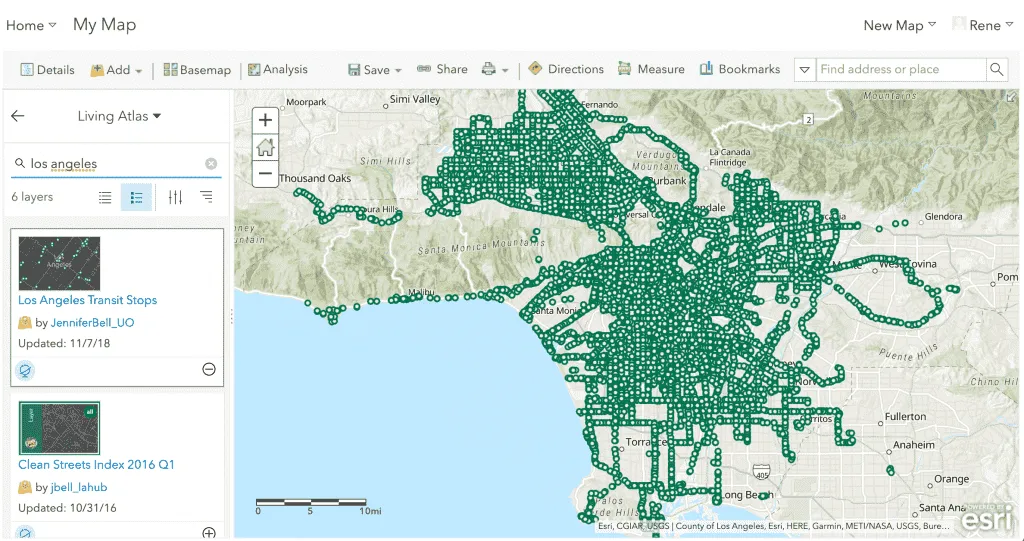
Transit Stops Data
Once you’ve done that, click on the Details button at the top. Now, click on the save icon to save your map to your Online account. Give your map a name, and add at least one tag. The description is optional.
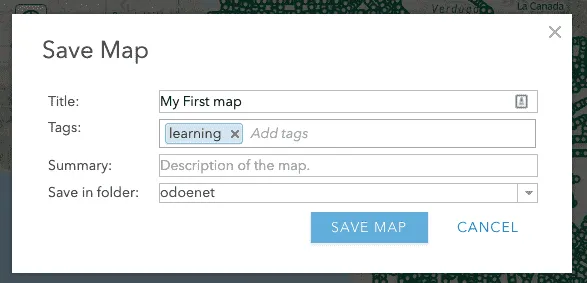
Save Web Map
With the map saved, click on the Share button and check on the Everyone (public) option and click on the Done button. Your map is now available for everyone to view!
Awesome! You just made your first Web Map with ArcGIS! You can now copy the URL and share it with others. But let’s make things a little more interesting. Let’s consume this webmap in your own application.
Copy the URL and save the webmap id, which will be in this format of the URL. ?webmap=WEBMAP_ID.
Go to developers.arcgis.com/javascript and take a look around before we dive into using your own Web Map with JavaScript.
My First Web Map
Let’s dive right into making a map!
<!DOCTYPE html>
<html>
  <head>
    <meta charset="utf-8" />
    <meta name="viewport" content="initial-scale=1,maximum-scale=1,user-scalable=no" />
    <title>My First Map</title>
    <style>
      html,
      body,
      #viewDiv {
        padding: 0;
        margin: 0;
        height: 100%;
        width: 100%;
      }
    </style>

    <link
      rel="stylesheet"
      href="https://js.arcgis.com/4.12/esri/themes/light/main.css"
    />
    <script src="https://js.arcgis.com/4.12/"></script>

    <script>
      require(["esri/WebMap", "esri/views/MapView"], function(WebMap, MapView) {
        // create a map instance
        const webmap = new WebMap({
          portalItem: {
            id: "be4b2af07b5a4d40a4deeae1b11fe3cc"
          }
        });

        // create a view to display
        // our map data
        const view = new MapView({
          container: "viewDiv",
          map: webmap
        });
      });
    </script>
  </head>

  <body>
    <div id="viewDiv"></div>
  </body>
</html>
Don’t worry too much about the details at this point. In the sample, we are doing a couple of things.
First, creating a WebMap that will use the given webmap id by providing a portalItem to the WebMap. When working with the ArcGIS API for JavaScript and items from ArcGIS Online, they are referred to as Portal Items. You can learn more in the documentation on Working with the ArcGIS Platform.
Second, you create a MapView that will draw the data contained in our web map. It is the job of the MapView to read the contents of the map, determine what layers to draw, at what scale they should be drawn and how to center the map.
require(["esri/WebMap", "esri/views/MapView"], function (WebMap, MapView) {
  // create a map instance
  const webmap = new WebMap({
    portalItem: {
      id: "be4b2af07b5a4d40a4deeae1b11fe3cc",
    },
  });
  // create a view to display
  // our map data
  const view = new MapView({
    container: "viewDiv",
    map: webmap,
  });
});
Congratulations! You just authored your fist web map and consumed it in a web app! In this series on ArcGIS for Web Developers, we’ll cover some more basics, so stay tuned and happy geohacking! In the meantime, you can have fun with the ArcGIS Developer tutorials to learn more!